Uncategorized

Essence cosmetics: Liquid ink eyeliner

Hey Lovelies,

I really love Essence products and I try to get a new product from them whenever I can. My latest products have been the liquid ink eyeliner, the matt touch blush and Instant matt setting spray. I loved the Essence Superlast eyeliner though I did wish the brush was better. I heard so many positive things about the liquid ink liner so I decided to give it a try.

essence-liquid-ink-eyeliner-waterproof

Details:

  • Price: R55.00 at Clicks stores
  • Type: Liquid eyeliner
  • Description:
    • This is the must-have eyeliner! The liquid ink eyeliner waterproof with the special fine tip applicator makes applying an accurate, black line as easy as child’s play for gorgeous eyes.

My thoughts:

What I ♥

  • This liner has a good thin bristle brush applicator. I almost wish this was the brush on the Superlast liner.
  • The liquid is really pigmented
  • It does not smudge at all. Once it dries it stays in place.
  • There is no flaking of the liner during the day.

Cons:

  • This liner is initially pigmented but I do find that it fades a little in certain parts during the day. I am not sure if my eye shadow is coming through from under or if it is getting caught on the liner from the lid. I find that going over the line again helps to prevent this.

I think this liner is really great and affordable. I do prefer the Superlast formula over this one but the brush on this one is great. So you guys can choose based on which aspect is more important to you.

I have become a fan of this liner and I use it almost daily, so I will not rule out purchasing this again 🙂

Thanks for stopping by guys.

XOXO Beauty & the Bronzer


Uncategorized

The different types of eyeliner and how to choose the right one for you

Hi Lovelies,

Now while the rest of the world has swiftly moved on to baking and contouring, I still see a lot of people that still struggle with applying eyeliner and winged eyeliner.

I definitely think choosing an eyeliner that you are comfortable with plays a huge role in getting the skill right so lets take a look at the different eyeliner types and what they each have to offer.

1. Gel eyeliner:

  • These usually come in little pot shaped containers and they can be applied with a flat, bent or angled eyeliner brush.
  • I usually find this great if you get the correct one. Some are really dry and difficult to apply.
  • I would not recommend the Maybelline gel eyeliner as I had various issues with it. The Morphe slate gel eyeliner is great and many people rave about the Inglot one as well.
  • With the correct brush it is easy to apply this on the eye. I do find that doing wings can be a bit challenging though.
  • I definitely think this takes a bit of practice to get used to. Try and get a nice thin angle/flat brush to apply this liner.

2. Pencil/gel pencil eyeliner

  • These are great as they are not too expensive and they are great for practicing.
  • I do find though that most of these liners do smudge on the eye lid so the staying power is not that great
  • I mostly use these on my lower lash line or my waterline
  • I really like the Avon glimmer sticks and the LA Girl gel glide eyeliner pencil.
  • These also come in a variety of colors which I love.

3. Liquid eyeliner

  • These are my favorite and it works really well if you find a great one
  • I find these the easiest to work with and once they dry majority of the time they do not budge
  • The liquid liners usually come with a brush or felt tip applicator.
  • I usually look for a thin consistency of the liquid, non-flaky once it has dried down and a thin brush. I prefer the brush over the felt tip applicator but I will occasionally buy the felt tip it the liquid liner itself is good.
  • My favorite are the NYX matte liquid eyeliner, Rimmel glam eyes & Essence super last.

4. Felt tip liners

  • The first felt tip liner I tried was from BH cosmetics. These look like felt tip pens and the liquid is in the pen.
  • If you get a good quality one the tips are great for applying liner. I do find however that they dry out pretty fast
  • I think the trick with this is finding one with a great tip that does not move around a lot. This way you can get a precise line even if you are not that great with applying liner.
  • Personally I am not a fan of these liners but I recently saw the great reviews the Fenty Beauty Flyliner has been getting and I am seriously considering trying it.

For me eyeliner is the one makeup product I wear daily so I am constantly trying new ones and refining the skill. Once I found my favorite type of eyeliner I just kept practicing with it and now I can do my eyeliner in my sleep 🙂 However, even with many years of practice I still have my off days where my liner just won’t cooperate with me and drives me crazy! This will happen no matter how many time you practice what so just be strong and keep going 🙂

If you are a beginner and looking to try affordable eyeliner I suggest looking at the Essence, LA Girl or Wet n Wild brand which are good value for money.

If you have any questions drop them in the comments section below.

XOXO Beauty & the Bronzer


Uncategorized

Purple eye look using my Desert Dusk palette

Hi Lovelies,

The Desert Dusk palette is one of my most favorite eye shadow palettes. I love this purple look I was able to create with it.

This look is inspired by one of Huda’s looks for this palette 💜Eyeshadow @hudabeauty Desert dusk palette :

  •  Details for this look from the Huda beauty site:
    • Use Amethyst all over the lid as a base and blend up into the crease. Intensify the crease using Oud and smoke it out in the inner and outer corners. Lightly blend Royal into the lid and then dab Twilight all over with your finger to maximize shine.

Brows @blackopalsa brow kit
Primer @maybelline 24hr superstay and @smashboxsa primer water
Foundation @maybelline fit me
Concealer @maybelline fit me
Lip @urbandecaycosmetics Double crossed liquid lipstick topped with @hudabeauty lip strobe in Shameless
Setting powder @yardleylondon_satranslucent powder
Contour @lagirlcosmeticssouthafrica pro conceal in dark
Bronzer @benefitsouthafrica Hoola bronzer
Setting spray @smashboxsa primer water
Blush @essence_cosmetics matte blush
Strobing powder @lagirlcosmetics
Highlight @makeuprevolution pro glow 2 palette

XOXO Beauty & the Bronzer

Uncategorized

Tips to spot a fake makeup product

Hey Lovelies,

Hope you are all doing well.

Today I wanted to write about spotting fake products as I think many of us out there really do not know what to look for or do not question what we buy. How many times have you seen people selling these fancy brand products and product sets for ridiculous prices and thought ‘Wow, this is too good to be true’. Well that’s because it probably is but rarely do we question if the products are authentic.

images (2).jpg

One of my friends recently bought one of these fancy product sets and just from the price & the pics of the packaging I knew they were not authentic. I told her and she started doing her research as well and picked up that they were fake. She did not ask the seller if they were authentic so she felt bad to cancel the order. When she received the stuff she inspected them closer and watched some comparison videos just to confirm it, and they were definitely fake. She did not at all initially assume they could be fake but she was really glad that I had shed some light on this for her.

Essentially that story is the inspiration for this post. Fake products can be found at every corner but do you know what are the characteristics that give them away? I know I didn’t at first but I have learnt a lot along the way that needs to be shared 🙂

When I first got into looking at purchasing international brand’s products, that are not stocked in SA, I obviously ran to Google and look for other bloggers or influencers’ opinions regarding which sites in SA were selling these products. As my research deepened I began to see more and more posts about fake makeup products being sold. Until then it had not even crossed my mind that some of the sites I had visited were selling fakes, I just thought it was really cheap!

When I made my first purchase my OCD was in overdrive and I watched so many videos that did comparisons the of authentic vs fake product that I bought. I examined it so closely and was so happy that it passed!!!! 🙂 As time went on I became better at identifying the signs which I will be sharing today. First though lets take a look what a fake product is & at some of the risks of buying them.

What is considered a ‘fake’ makeup product

A fake makeup product is usually branded & sold under the pretense of an authentic brand’s product. It uses the authentic brands name, product type, similar product colors, sometimes the logo & the design as well. The product quality itself will differ depending on the ingredients used.

Concerns surrounding fake makeup products

The ingredients in these products may be harmful as they are usually not the same ingredients used in the authentic product. This could potentially lead to allergic reactions and other unpleasant side effects. This is why it is always best to test products on a small part of your skin if you are unsure.

The quality of the product may not live up to expectations due to the ingredients not being used. This may leave you feeling a bit disappointed with your purchase. In many instances people do not realize the product is fake so they leave bad reviews on the real brands pages which actually damages the brand itself.

While all fake products may not be harmful it is usually best to test them before use if you suspect them are not authentic.

What to look for when determining if a product is fake

word-fake-under-magnifying-lens-white-background-red-colored-font-concept-counterfeit-fake-duplicate-copy-work-products-29747193

The below are some of the signs that will give you an indication if a product is not authentic:

  1. Price
    • Sometimes the first giveaway will be the low price of the item.
    • You can usually check a products price on their website, if it’s in Dollars or any other currency, then use the converter on Google to assist in determining the SA Rand price and work from there.
    • In some instances the price may still be high as the product may really closely match the original. In this case you can move on to the other checks below.
  2. Product Packaging
    • Sometimes the packaging will have slight or obvious variations to the original products packaging.
    • Check how the product looks on the authentic site and start comparing. For slight variations you may struggle but for the more obvious deviations you will spot them immediately.
    • Compare the following:
      • Placement of the logo on the item
      • Spelling of words on the item
      • The type of language used
      • The font of the writing
      • Colors on the packaging,
      • Placement of images,
      • The actual images that are used
      • Size of the item.
      • Shape of the packaging
  3. Product type
    • In many instances you will find that the product type being sold is not even being made by the authentic brand itself.
    • I once saw an eyeliner being sold and it was branded as one of my favorite brands & I immediately knew that the brand did not manufacture eyeliner.
    • If you have doubts check on the websites if the product being sold is actually made by the company.
  4. Quality of the formula
    • This is definitely one to look out for but if you haven’t tried the product before how would you know right? This is when I use YouTube as many influencer’s do comparisons of the formula’s that can be helpful.
    • If you have a tried the product before and still have it you can do a quick comparison to check the formula’s against each other.
    • Check if the consistency is the same, example if the formula is thicker or blotchy, if it dries down and becomes flaky.
    • Brands also publish the characteristics of their products on their website. This could be qualities such as long wearing, highly pigmented, durable, moisturizing, etc.
    • Read reviews to see if the product really lives up to these characteristics and test yours to see if it does.
  5. Shade
    • The shades in some cases will differ slightly or drastically.
    • Look at swatches online of the products and you will be able to easily determine if it is real or not.
  6. Smell
    • Some products have distinct smells to them.
    • I know this is probably not a dead giveaway but if you are used to a product you will notice the difference in smell. It usually will not smell as good as the original product.
  7. Product applicator
    • Most of the time you may notice a difference in applicator.
    • They may be lower in quality and shaped differently.
    • Again this may not always be an obvious indicator but it is one to look out for. Looks at pictures online and make the comparison between the applicator.
    • Look at the length of the applicator, the type such as brush, wand brush, etc.

How to avoid purchasing fake products

  • Buy products from the brands verified site. This will usually be on their social media pages or you can Google it.
  • Buy products from stores that are official stockists of the brand you want. Most brands usually list the store names of their official stockists on their website.
  • Request proof of authenticity if you are purchasing from someone who is not an official stockist, like a proof of purchase from the brands site or store.

While some fakes are not as obvious as others there is always a tell-tale sign. If you just do a little investigating you will be able to spot the differences easily.

I definitely think there is more awareness around this topic nowadays which is great and I hope that these tips were helpful. Let me know about your experiences as well below.

Thanks for stopping by guys 🙂

XOXO Beauty & the Bronzer

Uncategorized

I stopped straightening my hair & here’s what happened :)

Hey Lovelies,

Do you remember life before hair straighteners? I sure do! I even remember the time people would use their clothes iron to straighten their. Then there was hair relaxing, Brazilian hair treatment and permanent hair straightening.

Enter the hair straightener!!!!!

GHD was all the rage and expensive as well. Soon more affordable brands entered the market and we were all hooked on straightening our hair everyday to make it look as perfect as everyone else’s.

So I got married last year and I decided to grow my hair out as I wanted it to be really really long and flowy for the wedding. When I went on honeymoon the island life did not really require you to do much to your hair as it was way too hot and after just a week of not using a hair straightener I noticed how alive my hair looked.
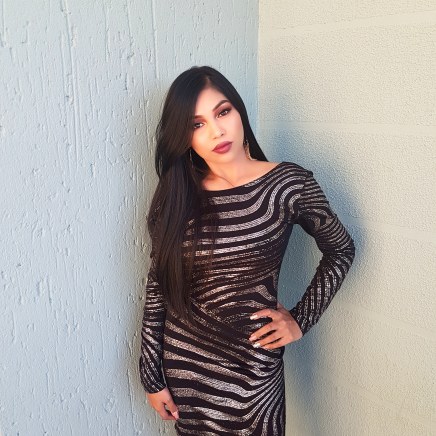
20170503_190903

Island hair

When I got back to SA I decided to continue to not use a hair iron. That was in May last year and I have been going strong ever since 🙂

The consequences

As with all decisions the consequences of going cold turkey on straightening meant that I had to spend more time styling my hair after washing, which is usually twice a week. I needed to use the concentrater  from the hair dryer (the attachment that comes with the hairdryer) to set the ends and smooth out my hair. I also needed to get a nice brush to set my hair with. I got a Tressemé brush that’s pretty gentle on the hair.

On a daily basis I would sometimes just need to use the hair dryer on the ends to make them look neat and then I would apply some leave in setting spray. Some days I just set the ends with me leave in spray and carry on with life, this saves me so much of time in the morning :). The wavy ends gave my hair some dimension and made it look fuller.

In the beginning it seemed so weird not to put on my hair iron and run it through my hair but soon I was in a routine. I would only ever use my straightener to curl my hair, which would be a few times a month.

When I visit the salon to wash and set my hair the stylists would look at me so weird when I said that I did not want them to use a straightener on my hair. The stylist kept asking me if I am sure lol….it was like I was the first person ever to ask them to just set my hair with the hair dryer.

After a few months I did not even think about using my straightener, I was doing good and so was my hair. I had to invest in better brushes and hair products but I was willing to see where this hair adventure was going to take me.

IMG_20180320_103845_773

The benefits

After about 6 months of no straightener I remember looking at my ends one day and I could hardly spot a split end. I definitely had way less split ends than ever before.

I had less hair falling out & breaking off as well which was awesome! My hair was growing much faster than before and I know this because it took quite a while to get to the length I needed it for the wedding. Once I had stopped using my hair iron it really seemed to be growing so much quicker. Well there goes the myth that cutting your hair makes it grow faster :p

My hair also did not feel or look as dry as it used to before. You guys know what I mean right, after a while you usually begin to notice the damaged dry ends even if you are using protective treatments.  Due to this I was not using my hair treatments as often as before as it was not necessary.

After a year of not cutting my hair it still looked overall healthy and thicker than before. I eventually cut my hair after 14 months as my layers had grown out and my ends were uneven. I did have split ends but they were so much less prominent than before.

I was actually saving myself so much of time by just embracing my natural hair. I really cannot believe I had not done this sooner 🙂

Overall, my hair feels better than ever before. I also like that it is bouncy and not flat (straightening made my hair look really flat). Damage, split ends and dryness is far less noticeable on my hair now and I am loving it.

IMG_20180406_164414_526.jpg

My thoughts

Have you ever really thought about the damage using a hair iron every day does to your hair? I know I didn’t. The temperatures on most hair irons go over 200 degrees and we directly apply it to our hair everyday. How effective are those heat protection products that we use? We buy them but do we actually see the required benefits from them?

We all want gorgeous healthy hair and we go out there trying to find products & processes to add to our routine when maybe we should look at what we can stop doing to damage our hair. I know now that eliminating using a straightener has really opened my eyes and allowed me to embrace my natural hair. Using a hair dryer already puts strain on your hair so find ways to minimize the heat applied to your hair.

I did start using more styling products in my hair but I will take that over increased heat on my hair any day. Maybe one day I will eliminate the hair dryer as well from my routine.

So lovelies, start analyzing your hair and your hair routine and see if there is anything you can do to help your hair be the best it can be 🙂 If you have any tips for me leave them in the comments below.

Thanks for stopping by guys.

XOXO Beauty & the Bronzer

Uncategorized

Wet n Wild cosmetics: Megaliner

Hi guys,

When it comes to eyeliner I am particularly fussy as it is my favorite makeup product. Now that I have found out that Rimmel has discontinued my favorite eyeliner, the Glam eyes, I have to find a ride or die replacement. So you guys can expect many more eyeliner reviews in future.

I have been wanting to try this brand for a long time and I am glad I did. Generally speaking the products are really affordable and the reviews are pretty decent. I purchased this liner from Clicks.

download (6)


Details:

  • Price: R49.95
  • Type: Liquid liner
  • Colors available:
    • Black
    • Blue
    • Purple
    • Brown
  • Description:
    • High-def pigment and a rich, fluid formula that goes on quick and easy to give you perfectly lined eyes that last.
    • Dries fast and stays put to enhance and dramatically define the eyes.
    • An easy-to-control, flexible brush gives you precise application.
  • Claims:
    • Formulated with high-definition pigment and a unique blend of polymers
    • Long-lasting, smudge proof wear

My thoughts:

What I ♥

  • The liner has a great consistency. It’s not lumpy or thick.
  • The brush is shaped well to help give a sharp wing and a nice thin line.
  • There is no smudging or flaking which is one of the most important characteristics for me.
  • This liner is really pigmented
  • The finish is awesome. It got a satin sort of finish.
  • This liner does not fade at all during the day.

What I didn’t like:

  • As time went on I noticed the brush is not that great quality. It bends and gets a bit out of shape. Initially it seemed like a great brush but now not so much.

I am using this liner daily and still managing to slay my liner so I am not writing it off just yet. I think if you are a beginner looking to try liquid eyeliner this could be great for you. It will provide you with a decent product to practice with at a great price.

Compared to my Essence eyeliner, which is also really affordable, I have to say it seems like a low-priced liner comes with certain downgrades regarding the brush. This is still a great product though and I would recommend this for purchase if you are willing to comprimise a little on the brush. Considering other liners that I have tried this is definitely one of the better ones.

I am wearing the liner in the pics below:

Thanks for stopping by guys.

XOXO Beauty & the Bronzer


Uncategorized

Skin care tips

Hi Lovelies,

I hope that you are all having a fab day 🙂

I really have the sweetest followers on Instagram and they are constantly complimenting me and telling me how good my skin looks. So I though I would take this opportunity to share my skin care routine & tips coz sharing is caring 🙂

My tips will include both life style and beauty product tips as I feel they go hand in hand for great skin. I have combination skin so my routine and product types may differ to people with oily & dry skin but I think the core concepts of skin care will still apply to everyone :). Most brands out there create the same product for different skin types which assists in catering for all our needs.

The different skin types can be seen below:

613247452-612x612

If you need help understanding your skin type then check out this post from Huda Beauty which decodes the characteristics of different skin types.

In addition to understand your skin type, you must also understand your skin needs and then find the relevant products to meet those needs. Every product you use needs to be there for a reason.

Skin care & Lifestyle


So lets start with the basics guys, just exercising, sleeping, eating right & drinking lots of water really does wonders for my skin!

I refrain from fizzy drinks and juice as much as possible. I drink at least 4-5 glasses of water a day. I know 8 is recommended but I will get there. The important thing is to start and have your own rules. I find that carrying my water bottle around ensures that I meet my water requirements. Water will help to flush out the toxins from your body and ultimately lead to clear skin. I have definitely seen the skin benefits of cutting out other sugary drinks and replacing them with water. This also leads to weight loss benefits so it’s a win win situation 🙂

I try to exercise regularly. This really goes a long way as it improves the blood flow in your body which increases the flow of oxygen. After I have sweated out all those impurities with a good gym workout, I do notice a nice glow on my skin. I know that not all of us are gym people so start small guys, try to take the stairs when you can, play a sport, join a class or even get some equipment for home. I have an exercise mat and weights that I use at home. I got the mat from Dischem and the weights I bought at my Zumba class.

About 2 years ago I significantly changed my eating habits and I will never look back. This has done wonders for my body and my skin. I have reduced all sugar and junk food from my diet. I actually notice that my skin now looks healthier and feels better than ever before and I am sure this has played a huge role. I still have my cheat days and bad eating days but overall I keep to my good eating habits. Chocolate is my definite weakness so I now have it in moderation. I read this article in Cosmopolitan magazine about the link between diet and skin that really helped me to understand the skin benefits of eating right : https://www.cosmopolitan.co.za/advice-buys/the-truth-about-diet-and-your-skin/

Lastly, my favorite lifestyle skin care ritual is beauty sleep :). If you needed a reason to sleep more, then here it is :). When I was studying I used to sleep minimal hours because I was so OCD about cramming in as must as possible before the exams. Wow did that take a toll on my skin. My skin looked dull & lifeless and it felt so dry. Even these days if I have a night of minimal sleep my skin feels horrible to me. I try as much as possible to get at least 7 hours of sleep a night to allow my skin to have some down time and rejuvenate. Beauty sleep is real guys, don’t let people convince you otherwise 🙂

Skin care routine & products

46b33e9e33acaa99483cc71afd47def8

I am sure that everyone has a skin care regime that consists of various awesome products. Skin care is different for everyone as we all have different skin types so what may work for one person may not work for another. Growing up I realized this very quickly as my mum, sister & I did not use the same brands. My sister and mum swear by Dove but it causes me to break out.

I am going to do a run through of my routine and the types of products I use to keep my skin looking and feeling great. I will mention the brands I use but as mentioned above I know everyone has preferences for different brands that they have tried and tested over the years.

1. Cleanser

  • I use a gentle face wash every day to cleanse my skin. On the days I exfoliate I skip my face wash.
  • I particularly say ‘gentle’ face wash and it should be as you need to use it everyday.
  • Your cleanser should leave your face feeling refreshed and soft & if it doesn’t then make a change guys.
  • At the moment I am using a Nivea 2 in 1 cleanser & toner for normal & combination skin which I love and I feel is great for every day use.
  • I have tried other face washes which totally dried my skin out and those definitely got tossed out.

2. Eye cream

  • I use eye cream daily to keep my eye area hydrated and bright.
  • I started using eye cream in my late 20’s though many of the articles I have read suggested that you start in your early 20’s…Oh well :/
  • You should apply eye cream at least once a day but preferably twice a day.
  • I usually apply my eye cream before my face sunscreen and moisturizer.
  • I am currently using a L’Oreal eye cream during the day & an Estee Lauder night eye cream. It isn’t necessary to use to different eye creams for day & night but I prefer it.
  • Here are links to good eye cream options that I have checked out to help me decide which eye cream to purchase:

3. Face sunscreen

  • I wear face sunscreen every single day of the year.
  • I read about the benefits of using a face sunscreen daily in a magazine years ago. I researched the benefits and ever since I have added this to my daily skin care routine.
  • As we get older we need to protect our skin from the sun’s harmful rays and since our face is most often exposed to the sun it makes sense to wear sunscreen daily.
  • I apply it to my skin after eye cream & moisturizer.
  • I must say that I really have seen the benefits over the years which for me have included increased hydration and definite anti-aging assistance.  I will keep this as part of my skin care regime forever and ever 🙂 .
  • Here is a link to an article on the benefits of wearing face sunscreen to help you decide if this is for you:

4. Moisturizer

5. Anti-marks cream

  • I realized in my early teens that I needed to use a separate anti marks cream to combat those acne scars and I would noticed how quickly any pimple scars would disappear.
  • I now apply my anti-marks cream every morning after I moisturize .
  • It is really important to find and use a good anti-marks cream or spot treatment as the other products you use may not necessarily these target marks.

6. Toner

  • I use a toner a few times a week to remove impurities.
  • I used to tone everyday but I found it unnecessary and a bit harsh on my skin so that’s when I decided to buy a 2 in 1 cleanser and toner which proved to be much gentler on my skin.
  • I normally tone 2 times a week or after I have worn a full face of makeup just to ensure that all the makeup is thoroughly removed.
  • Currently I am using a Nivea toner.

7. Exfoliator

  • It is really important to exfoliate in order to remove those dead skin cells & unclog your pores.
  • I exfoliate my skin once a week to give it that extra clean that it needs.
  • Some people may prefer to exfoliate more but I feel like you can judge for yourself how often you need to exfoliate depending on your skin type and how your skin feels after exfoliation.
  • While using an exfoliator is great there are downsides to using it too often. It can irritate the skin and leave it feeling too dry.
  • I am currently using an Oil of O’lay exfoliator which is amazing.

7. Facials

  • I use a face mask or go for a facial at least once a month.
  • The benefits of facials vary according to the type of facial you choose so make sure you choose one that will be beneficial to your skin type and skin needs.
  • The main benefits however include improved blood circulation and the removal of impurities.
  • I prefer natural products to be used on my skin so I have not tried any of the chemical treatments as yet. So far the natural products and treatments have worked for me so I am content with them.
  • I am quite a fan of  Ayurvedic facials

images

8. Makeup removal 

  • Makeup clogs your pores and can lead to acne so I ensure that I remove all makeup before bed. Sure there will be that odd day that you may forget or be too lazy but do not make it a habit.
  • I make sure to use a gentle makeup remover on my skin to avoid any irritations.
  • I recently tried a new makeup remover which was so harsh it made my skin, especially my eyelids, feel like it was burning. It was from a brand that I use often but I had bought a different type which I guess was the issue.
  • Currently I am using Garnier makeup wipes, Garnier Micellar water & Clarins eye makeup remover. I am also a fan of the Nivea makeup wipes.

9. Skin etiquette

As I got older I became more aware of how I treated my skin and now I always try to be soft and gentle.

  • Treat your skin lovingly ladies. Make sure you pat it dry instead of using harsh movements to wipe it.
  • When you are applying makeup, be gentle, especially around the eye area as the skin around the eye area is especially delicate..
  • Refrain from pinching pimples and scarring the skin. I know this is easier said than done but remember it takes longer to heal if you pick at it.
    • If however you have pinched the skin I find that applying Vaseline or Bio-oil (I love bio oil) to the hurt area really speeds up the healing process and leaves minimal scarring.
    • Also as mentioned using an anti-marks cream can assist in speeding up the recovery process.
  • I recently moved from waxing my brows and upper lip to threading to decrease the strain on the skin. I do feel that threading is a bit more painful but it is supposed to be better in the long run. Waxing is said to be more harsh on the delicate upper lip & brow skin and can even lead to increased wrinkles.
  • Try to not use too many new products at the same time. This way you if you have a reaction you will be able to determine which product caused it.
  • If you skin has been irritated by a new product wait for the skin to feel better before applying any makeup to it. I had to go cold turkey on makeup when I recently had the skin reaction to my makeup wipes. I applied my home-made face mask to sooth my skin for a few days.

10. Makeup free days

  • I am all about makeup free days to give my skin time to breathe.
  • I do not use foundation or a full face of makeup everyday. I mostly stick to my eyeliner, lipstick and mascara on weekdays.
  • Your skin needs a break from makeup products once in a while so that it can rejuvenate. Try every once in a while to go a day without makeup at least, especially if you wear foundation every day. You will definitely notice the difference this makes to your skin. It will feel refreshed and look healthier.
  • When I was growing up my mum was really strict and did not allow me to use any makeup. Eventually she caved with eyeliner and eyeshadow but the rest was a mystery to me. I only really got into makeup about 2 years ago, until then I did not even own a foundation :/ . Even though I was really pissed at the time I have to say I am really grateful to her as I think this played a part in allowing me to be comfortable in my own skin without makeup.

11. Home remedies

  • Do not be afraid to try home remedies as they actually work!
  • I previously posted the recipe for my home made face mask and I have carefully researched all the ingredients in it. I use it regularly and I love it.
  • Sometimes its the simple things that works so do not discount them because you are not paying huge amounts of money for them.
  • Some home ingredients benefits:
    • Avocado is a great source of vitamins and acts as an antioxidant on your skin. You can mash and apply it directly onto your skin or combine it with any of the ingredients below.
    • Sugar acts as an exfoliator and gently removes impurities from the skin. You can make your own exfoliator using brown sugar and honey. Mix them together and gently rub onto the skin. You can use this scrub for your lips as well.
    • Milk thoroughly and gently cleanses the skin. You can use this as an astringent. Wet a cotton pad with milk and gently cleanse skin. Your skin will feel amazing after.
    • Turmeric helps to lighten pigmentation, tightens the skin and can help to reduce acne scarring. You can mix this with water until you get a paste and then apply directly onto the skin;
    • Honey can be used for the treatment of acne and is a good moisturizer. You can apply honey directly onto the skin;
    • Cucumbers are soothing and refreshing. They add moisture to the skin due to their own high moisture content. You can eat them or apply them directly to the skin 🙂

12. Rotating my facial skin care brands

  • I change my product brands every once in a while and I do not really use an entire range from the same brand, as you probably noticed :).
  • I read somewhere that your skin can get used to a product and it eventually stops reacting to it. I have a few brands that I really like so I rotate between them and I find this works for me.

Looking to my skin future

  • I am constantly researching skin care and ways to keep my skin looking good. I really want to start using a facial oil. I feel that as I am getting older this will really assist in keeping my skin nourished and provide extra moisture.
  • I recently purchased a serum but I have not used it enough to give my opinion on the benefits as yet. Will keep you updated on that.
    • Serums are said to be really effective as they contain a concentrated amount of the ingredients required for combatting skin issues. They are also thinner in consistency than other products, such as moisturizer, which allow them to absorb faster & easily into your skin.
  • I have also started some research into Micro-needling. Many people with gorgeous skin swear by it.
    • Micro-needling is a procedure whereby tiny needles puncture the skin and promote the production of collagen leaving the skin looking younger.
    • You can read about the benefits here. I am still deciding if this is for me.
  • I am also looking at other brands to try & on my list are Elizabeth Arden, Bioderma and Clinque.

I think we can all agree that taking care of our skin needs to be a priority but do not be overwhelmed with the information out there or in this post. Start slowly and you will find your way. Understand your skin type and then research, research, research!

Your skin care routine will be ever-changing because as we get older we our skin needs change. I know some products are ridiculously expensive, so use your skin needs as an indicator of what products you should splurge on. For example, I feel that eye cream is something I do not mind spending more money on now to combat fine lines I have noticed as I got older.

There are some reasonably priced skin care ranges out there that are amazing. I always recommend the Nivea range to my friends who are looking to start with their skin care routine as I find it to be both effective and reasonably priced.

Remember investing in your skin is an investment you will never regret!

Till next time ♥

XOXO Beauty & the Bronzer

Uncategorized

Urban Decay: All Nighter concealer

Hey guys,

Hope you are all doing great 🙂

I have been busy trying some new products and brands in an effort to widen my knowledge. I have been wanting to try out some Urban Decay products for a while now so I purchased the All Nighter concealer which has some great reviews from other bloggers and influences.

The in-store assistants were extremely helpful and knowledgeable which made the whole experience that much better 🙂 I have used this concealer quite a bit since I purchased it in order to thoroughly test it out.

Details:

  • Price: R400
  • Description from the Urban Decay site:
    • All Nighter Waterproof Full-Coverage Concealer provides flawless matte coverage that lasts all day and all night. Cover anything and get a perfectly blown-out effect.
    • Our ultra-pigmented, blendable formula controls shine and masks imperfections for 24 hours. And the beautiful, modern-matte finish never looks overdone.
    • Urban Decay is 100% cruelty-free.
  • Pro tips from the Urban Decay site:
    • Choosing the Perfect Shade:
      All Nighter Concealer is ultra-pigmented. So, when testing the product, swatch it on your skin, blend, and let dry down completely to see the true color before choosing your perfect shade. If it’s a toss-up between two shades, go with the lighter one.
    • Application Tips:
      • Remember, a little goes a long way.
      • For a flawless application, make sure that your skin is well hydrated and your moisturizer has absorbed fully before applying All Nighter Concealer.
      • All Nighter Concealer has ample playtime, but once it’s set there’s no need to go over it or reapply it.

What I ♥

  • I loved the shade I got, it really brightens up my face.
  • When they say full coverage, they mean it!
  • The wand applicator is great for applying the product onto the skin.
  • It blends well into the skin if you blend it immediately

Cons

  • The formula is bit more thick than any other concealer I have used thus far.
  • This concealer dries really quickly and once it dries there’s no saving it. Even a wet beauty blender cannot assist. You need to blend it as soon as you apply it. I used it to highlight my eyes, forehead and nose & by the time I got to blending the product on my nose it was too late. This was the first time this had happened to me & I had no idea how to fix it.
  • Once this concealer sets I find it to be really dry under the eye. It looks so great when you first apply it but after a while I did not like how dry my under eye was looking.

Considering the price and the brand I have to say I expected more from this concealer. I will not be using it under my eyes anymore but I will continue to use as a base for glitters & for highlighting and concealing other areas.

I have read many reviews and honestly people either love or hate this product. I would not say I hate it but I will not repurchase this unfortunately.

I would suggest that you go in store and let them test it on your skin & wear it for a full day. Check how it looks as the day progresses and then make a decision. I would not recommend this product for anyone with dry skin.

Thanks for stopping by guys.

XOXO Beauty & the Bronzer

Uncategorized

Sorbet cosmetics: Squeaky Clean Liquid Brush And Sponge Cleanser

Hey guys,

When Sorbet launched their makeup range I was quite excited to try out some of their products. I saw the brush cleaner and immediately grabbed it. Washing brushes is nobody’s favorite task and this promised to make it easier to clean your brushes.

20180306_175445.jpg

Details:

  • Price:  R89.95
  • Size – 250ml
  • Description:
    • Developed to clean your brushes and blender sponges.
  • How to use:
    1. Pour just enough cleaning solution into a small container, just enough to cover the brush or sponge.
    2. Dip in the sponge of brush into the solution and move it around to help dissolve or remove the make-up.
    3. Place the brush or sponge on a paper towel and squeeze thoroughly.
    4. Allow to fully air-dry before next use.

The directions for use do not require you to rinse your brushes in water before drying them, but I do. Check out my brush cleaning video on my Instagram page highlights to see the effectiveness of this product.

080316-brushes-sponges-lead.jpg

                                           Image from https://www.instyle.com/beauty/makeup-brushes-vs-sponges

What I ♥

  • This product can be used to clean brushes and sponges
  • It is really effective in removing makeup effortlessly from the brushes.
  • Sponges are usually harder to clean but this cleaner removed so much of makeup that mine actually looked almost as clean as when I first bought them
  • It is really easy to use. All I do is swirl my brushes around in the liquid and watch the magic.
  • There is no distinct smell left on your brushes after washing which is always a plus.
  • My brushes felt soft after wash so this is a gentle cleanser that does not damage your brushes
  • The price is pretty decent
  • The process is not a messy one
  • It has a great dispenser to help control the amount of liquid when you are pouring it into the container

Cons:

  • If you have a lot of brushes and sponges and you wash them often then this product will be used really fast. I basically got 3 uses out of this 250ml. I had to dilute it in some water for the last wash but  I would not recommend that as it is less effective.

I really like this product but you need to use a lot to wash your sponges especially. I will continue to buy it though until I find something better. The price is great so even buying one every month is not too bad.

Leave your comments or questions below. Give this post a thumbs up if you liked it and remember to click the follow button to get notifications of new posts 🙂

XOXO Beauty & the Bronzer


Uncategorized

Black Opal: Colorsplurge Brow Shaper Kit

Hey guys,

Hope you are all doing great 🙂

Do you remember when you first started coloring in your brows?????? Well I do and wow did I make some terrible mistakes.  Over the years however I have learnt how to properly color in my brows using powder kits, pencils and brow pomades. I became a fan of powder kits for everyday use as they were simple to apply and the outcome looked great.

I recently received the Black Opal brow kit and it was the first Black Opal product I had ever tried. I was really pleasantly surprised with the results when I first tried it and I have used it everyday since then :). I have the shade ‘Deep brown’.

snapchat-41529619.jpg

Details:

  • Price – R165
  • Description from the Black Opal site:
    • Achieve the look of professionally styled brows with this powder in a natural-looking shade, ideal for shaping, contouring and defining brows effortlessly.
    • It’s the perfect quick-fix to sculpt, accentuate arches and supplement areas where brow hair is sparse.
    • Comes with its own small, angled brush. A must-have for everyone.
  • How to use:
    • Apply the powder on the brow using the angled brush in short, light strokes to shape and define brows or fill in sparse areas. Can be used wet or dry
  • Shade range:
    • Red brown
    • Soft brown
    • Deep brown

What I ♥

  • This powder is so pigmented
  • I really love this deep brown shade, it looks so great on my brows. I lean towards brown shades for my brows as I feel black looks too harsh on me.
  • The product has minimal fall out which is awesome for a brow powder
  • It applies really well to the brow and blends in easily
  • It does a great job of filling in your brows and making them look awesome!
  • You can use this to create a natural brow look or add more product for a more defined & outstanding look.
  • It is a really good quality brow powder

The product does come with the brush but I have my own brow brush so I do not use it. I did try it once but I still prefer my thin angled brush (in the pic above). It is great though that the product comes with a brush for people that may not already have one which is why I haven’t written it up as a con 🙂

After trying this product I must say that I am now eager to try other Black Opal products as well 🙂 I hope you guys enjoyed this review.

Product used in the pics below on my brows:

This slideshow requires JavaScript.

Leave your comments or questions below. Give this post a thumbs up if you liked it and remember to click the follow button to get notifications of new posts 🙂

XOXO Beauty & the Bronzer